Great designs rarely happen in isolation — they’re shaped by conversation, iteration, and shared insight. Gone are the days of jumping between email threads, random handwritten screenshot markups, and third-party tools. Now, you can fast-track feedback directly within SketchUp for Desktop and the Web Viewer, thanks to new in-app commenting and real-time viewing.
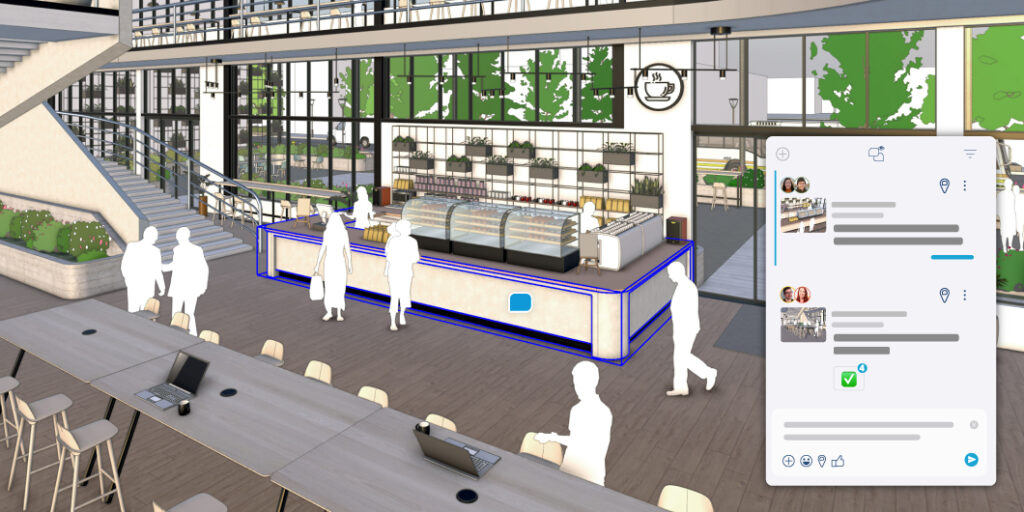
With built-in commenting, collaborators can now leave feedback directly in the model. Comments aren’t just static notes either — they’re attached to specific 3D geometry, so feedback is always tied to the relevant part of the model. Similar to how you’d comment in a Google document, you can have a threaded conversation tied to a specific aspect of the design, directly tag other collaborators, upload images and camera views to support your point, and add your favourite emoji.
By centralizing design feedback through targeted comments, you can easily hold design conversations and make effective decisions directly in SketchUp.

Invited stakeholders can now see the changes the design owner makes to the model instantaneously with real-time viewing. When you’re in a model together, everyone can see each other’s cursors and follow each other’s cameras, ensuring all stakeholders stay on track during design presentations and see exactly what you want them to see.
Because changes are visible as the designer makes them, you can try out options, talk through ideas, and make decisions in the moment. Additional capabilities to specify viewing and commenting permissions keep the file owner in full control and create a controlled environment for design iterations and conversations with stakeholders.
One new feature you’ll love is View Scenes. It’s a slideshow mode that allows you to curate specific views of your design to share with stakeholders for feedback, rather than giving them access to the entire model. When you can control permissions and views, it’s easy to point stakeholders to precisely what they need to review on your model — and steer them away from unfinished areas of the design.
Try it out in your next design review with a client! More flexible and professional documentation tools make collaboration smoother than ever.
More flexible and professional documentation tools
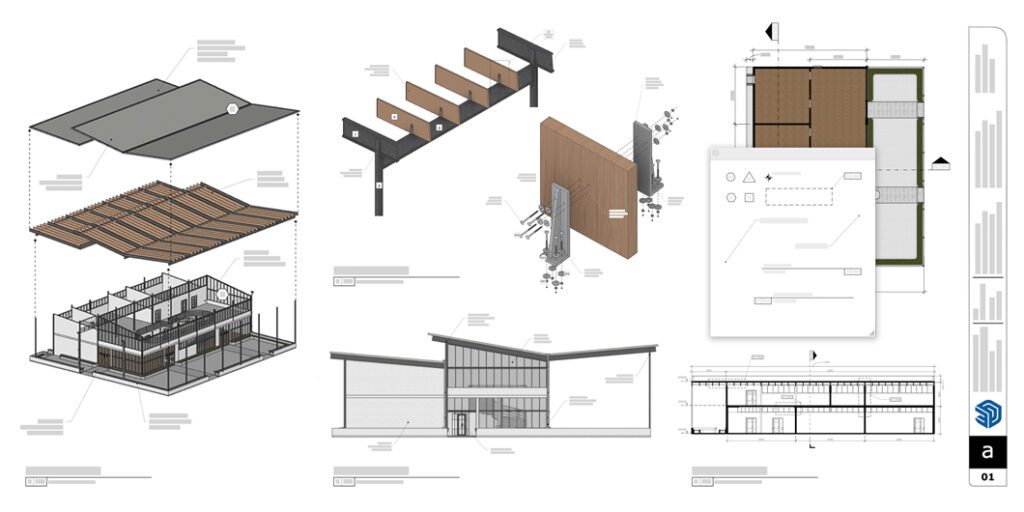
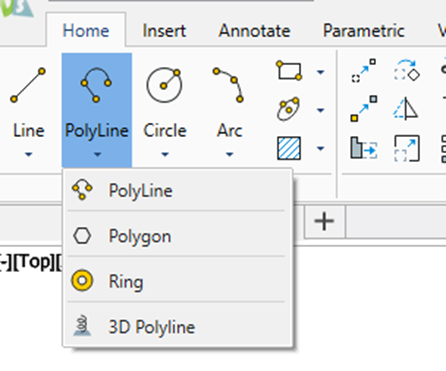
Find more versatility in your documentation workflow with updates in SketchUp and LayOut. Four new drafting tools unlock more intuitive and precise drawing for common illustration tasks, and updated scrapbook collections enable quick access to standard architectural graphics in LayOut.
Not using LayOut? These powerful updates make it worth a look. Whether you’re restarting in 2D, building a 3D model from 2D plans, or creating construction documents from your model, you can access more versatile tools to turn designs into professional, scaled, and annotated 2D drawings and presentations.
With enhanced DWG export, you’ll also experience greater control and an easier transition of 2D documents in and out of LayOut. This ensures that your drawings open and function as intended when moving from LayOut into SketchUp or other 2D CAD environments, with SketchUp tags now translating to DWG layers.
These continued interoperability improvements make it easier to get jobs done across your unique tech stack. Learn more about the new tools in the release notes.
Add real-world context to your model
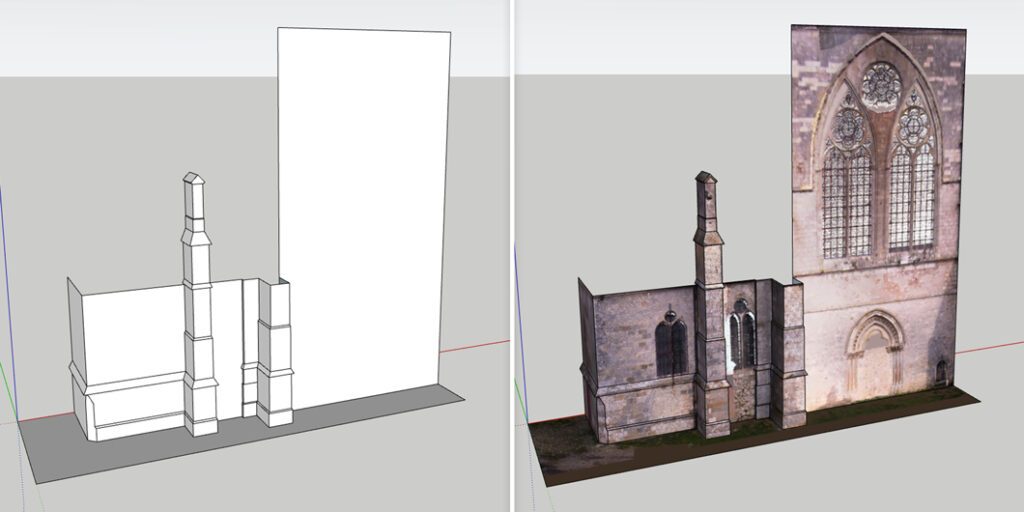
Enhanced point cloud capabilities make adding existing conditions to your models easier than ever. Updates to Scan Essentials help you efficiently model, visualize, and document using scan data in SketchUp and LayOut.
Texture Projection rapidly enhances the visual realism of your models. It allows you to project RGB data, define resolution, and even turn projected textures into a SketchUp material you can access repeatedly.
Another new feature, the Surface Mesh tool, simplifies the extraction of SketchUp geometry from point clouds.
Add Location has also introduced a new 3D Buildings feature for all modelers. This feature allows you to import surrounding 3D buildings into the 3D terrain natively — no plug-in required. This helps better incorporate real-world data into designs for improved visualization, shadow studies, and site planning.
More control over your visual style
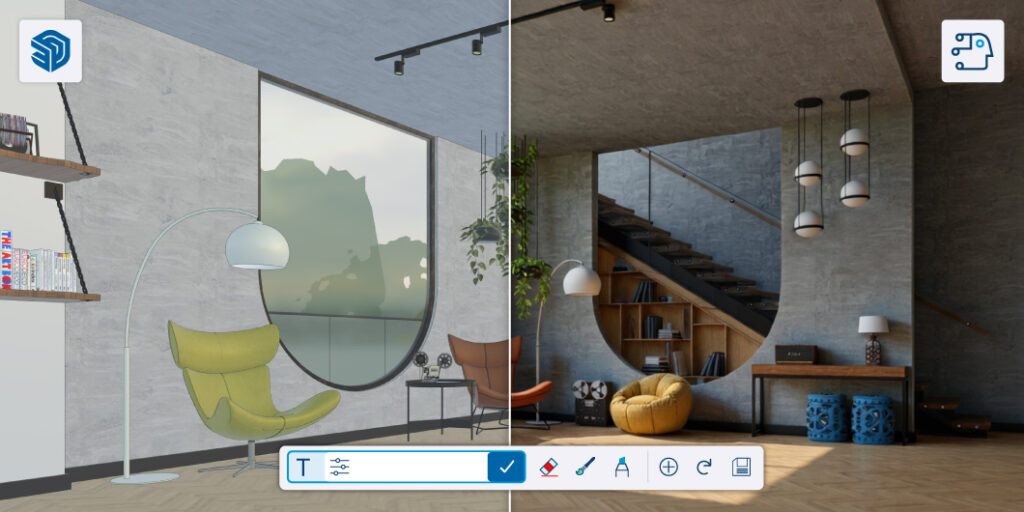
Our most popular visualization tools have been refined for greater control. New visualization updates offer customers more precise stylistic control through enhanced settings like Color Ambient Occlusion, Ambient Occlusion Scaling, and Invert Roughness.
A new version of Diffusion [LABS] brings more controlled, higher-fidelity AI-generated imagery. Generate images that more accurately represent your vision, explore conceptual iterations, and clearly communicate design intent much earlier in your workflow.
Color Ambient Occlusion (AO) lets you apply your desired tint to the shadows it creates, while AO Scale Multiplier provides additional options to control the depth and intensity of shadows in your model. Toggle on Invert Roughness within the Edit menu for Photoreal Materials to reverse the roughness map, giving users an expanded range of textures from glossy to rough.
Keep your projects moving forward. This release shows SketchUp taking a major step toward enhanced collaboration features. Check out What’s New for more details on all of the powerful new tools, and be sure to update your software for free to start working with them today.
Not a SketchUp user yet? Explore plans to start creating with confidence and bring your visions to life.
To Explore SketchUp Plans – Click Here
Start your FREE 7-day Trial – Click Here